Next.js GeneratorTable of Contents
Table of Contents
The Next.js generator scaffolds components for server-side rendered (SSR) applications using Next.js.
# Install
The easiest way to get started is to install the API Platform Symfony variant. It contains a Next.js skeleton generated with Create Next App, a development Docker container to serve the webapp, and all the API Platform components you may need, including an API server supporting Hydra and OpenAPI.
If you use API Platform, jump to the next section!
Alternatively, create a Next.js application by executing:
Pnpm (recommended)
pnpm create next-app --typescriptNpm
npm init next-app --typescriptYarn
yarn reate next-app --typescript
Install the required dependencies:
Pnpm (recommended)
pnpm install isomorphic-unfetch formik react-queryNpm
npm install isomorphic-unfetch formik react-queryYarn
yarn add isomorphic-unfetch formik react-query
The generated HTML will contain Tailwind CSS classes. Optionally, follow the Tailwind installation guide for Next.js projects (Tailwind is preinstalled in the API Platform Symfony variant)
# Generating Routes
If you are using the API Platform Symfony variant generating all the code you need for a given resource is as simple as running the following command:
docker compose exec pwa \
    pnpm create @api-platform/client --resource book -g next
Omit the resource flag to generate files for all resource types exposed by the API.
Or if you don’t use the standalone installation, run the following command instead:
Pnpm (recommended)
pnpm create @api-platform/client https://demo.api-platform.com . --generator next --resource bookNpm
npm init @api-platform/client https://demo.api-platform.com . -- --generator next --resource bookYarn
yarn create @api-platform/client https://demo.api-platform.com . --generator next --resource book
Replace the URL by the entrypoint of your Hydra-enabled API. You can also use an OpenAPI
documentation with -f openapi3.
The code has been generated, and is ready to be executed!
Add the layout to the app:
import type { AppProps } from "next/app";
import type { DehydratedState } from "react-query";

import Layout from "../components/common/Layout";

const App = ({ Component, pageProps }: AppProps<{dehydratedState: DehydratedState}>) => (
  <Layout dehydratedState={pageProps.dehydratedState}>
    <Component {...pageProps} />
  </Layout>
);

export default App;
# Starting the Project
You can launch the server with:
Pnpm (recommended)
pnpm devNpm
npm run devYarn
yarn dev
Go to http://localhost:3000/books/ to start using your app.
# Generating a production build locally with docker compose
If you want to generate a production build locally with docker compose, follow these instructions.
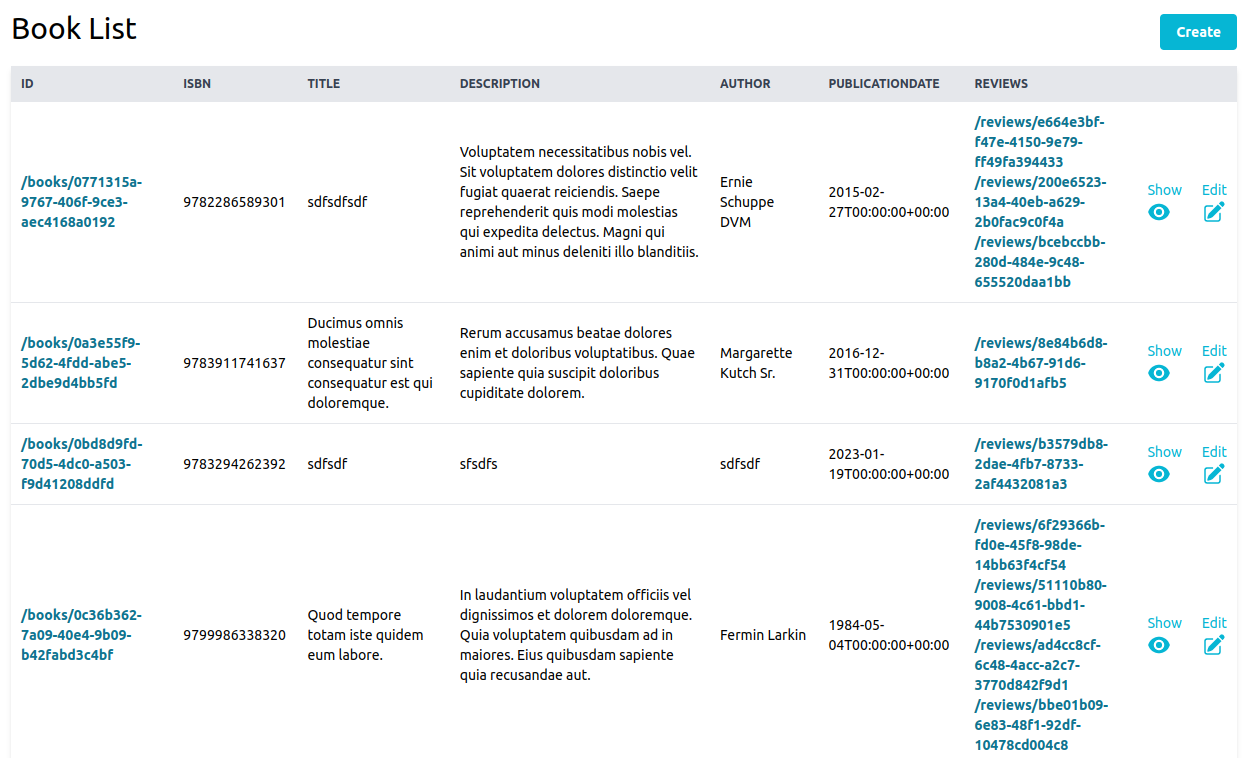
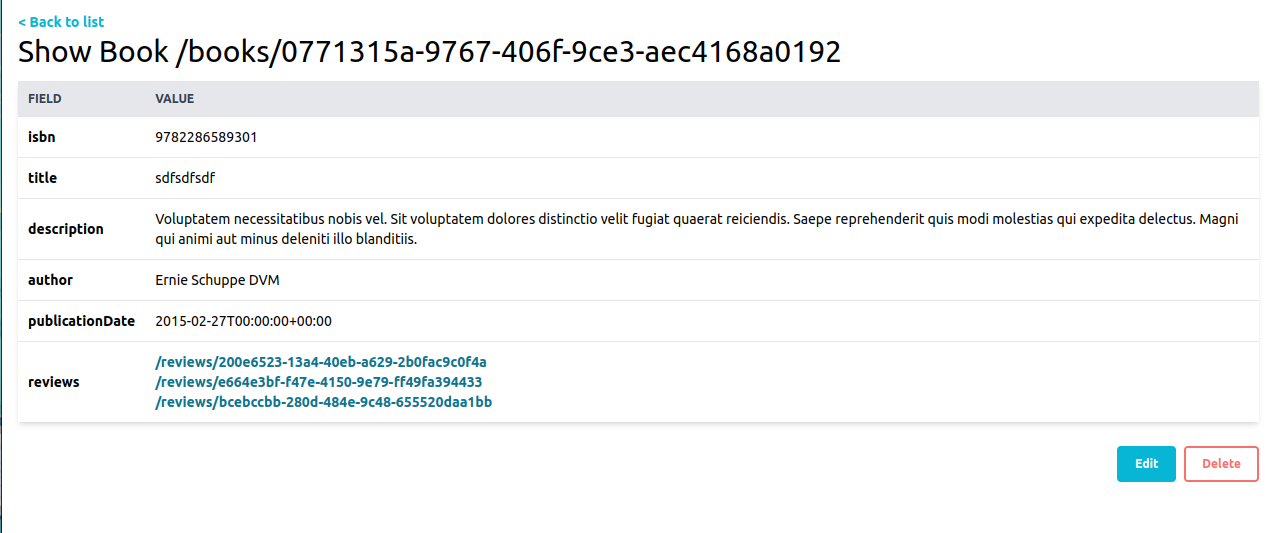
# Screenshots
You can also help us improve the documentation of this page.
Using an AI coding agent? See the documentation index for LLMs at /docs/llms.txt.
