Deploying with Docker ComposeTable of Contents
Table of Contents
While Docker Compose is mainly known and used in a development environment, it can be used in production too. This is especially suitable for prototyping or small-scale deployments, where the robustness (and the associated complexity) of Kubernetes is not required.
API Platform provides Docker images and a Docker Compose definition optimized for production usage. In this tutorial, we will learn how to deploy our Symfony application on a single server using Docker Compose.
Note: this tutorial has been adapted from the Symfony Docker documentation.
# Preparing a Server
To deploy your application in production, you need a server. In this tutorial, we will use a virtual machine provided by DigitalOcean, but any Linux server can work. If you already have a Linux server with Docker Compose installed, you can skip straight to the next section.
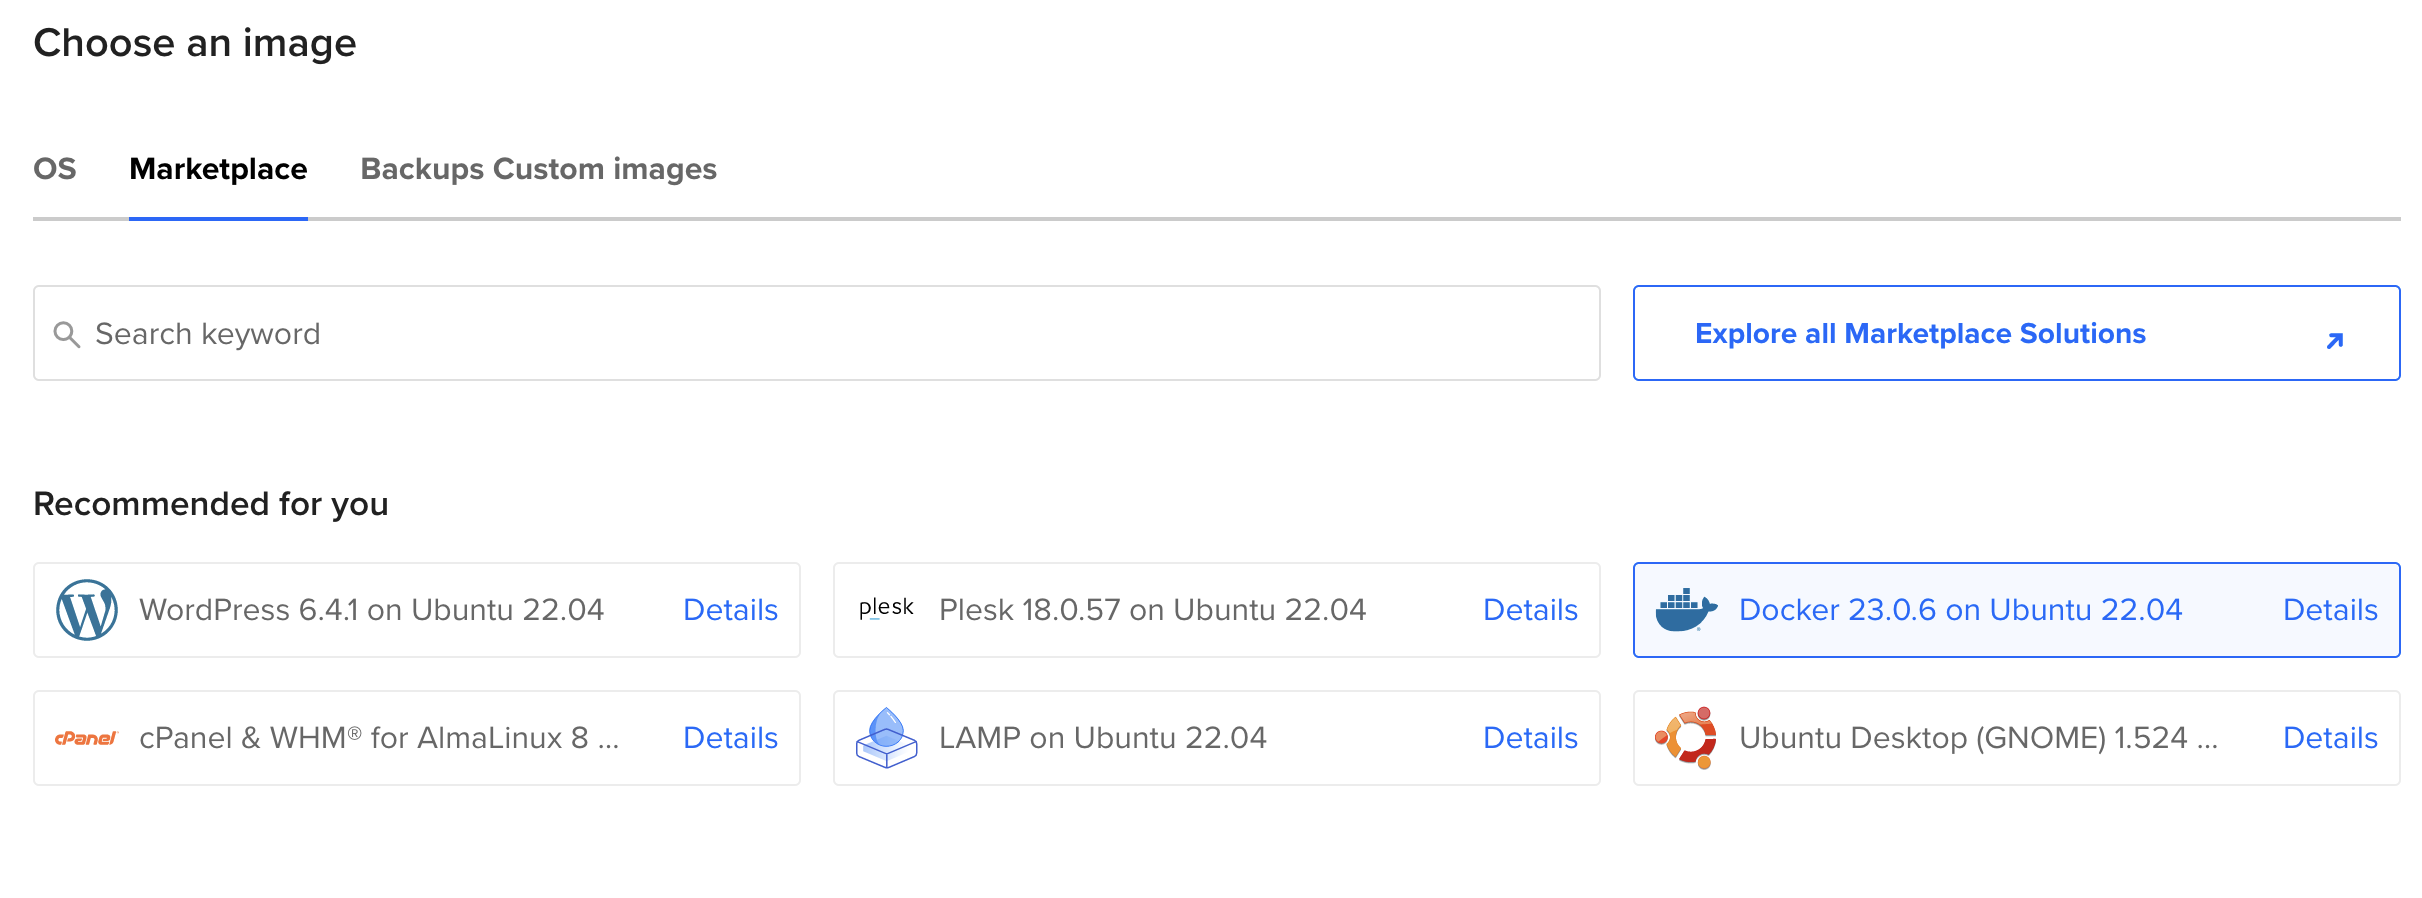
Otherwise, use this affiliate link to get $100 of free credit, create an account, then click on “Create a Droplet”. Then, click on the “Marketplace” tab under the “Choose an image” section and search for the app named “Docker”. This will provision an Ubuntu server with the latest versions of Docker and Docker Compose already installed!
For test purposes, the cheapest plans will be enough, even though you might want at least 2GB of RAM to execute Docker Compose for the first time. For real production usage, you’ll probably want to pick a plan in the “general purpose” section to fit your needs.
You can keep the defaults for other settings, or tweak them according to your needs. Don’t forget to add your SSH key or create a password then press the “Finalize and create” button.
Then, wait a few seconds while your Droplet is provisioning. When your Droplet is ready, use SSH to connect:
ssh root@<droplet-ip>
# Configuring a Domain Name
In most cases, you’ll want to associate a domain name with your site. If you don’t own a domain name yet, you’ll have to buy one through a registrar.
Then create a DNS record of type A for your domain name pointing to the IP address of your server:
your-domain-name.example.com. IN A 207.154.233.113Example with the DigitalOcean Domains service (“Networking” > “Domains”):

Let’s Encrypt, the service used by default by API Platform to automatically generate a TLS
certificate, doesn’t support using bare IP addresses. Using a domain name is mandatory to use Let’s Encrypt.
# Deploying
Copy your project on the server using git clone, scp, or any other tool that may fit your needs.
If you use GitHub, you may want to use
a deploy key.
Deploy keys are also supported by GitLab.
Example with Git:
git clone [email protected]:<username>/<project-name>.git
Go into the directory containing your project (<project-name>), and start the app in production
mode:
SERVER_NAME=your-domain-name.example.com \
APP_SECRET=ChangeMe \
POSTGRES_PASSWORD=ChangeMe \
CADDY_MERCURE_JWT_SECRET=ChangeThisMercureHubJWTSecretKey \
docker compose -f compose.yaml -f compose.prod.yaml up --wait
Be sure to replace your-domain-name.example.com with your actual domain name and to set the values
of APP_SECRET, CADDY_MERCURE_JWT_SECRET to cryptographically secure random values.
Docker can have a cache layer, make sure you have the right build for each deployment
or rebuild your project with –no-cache option to avoid cache issue.
Your server is up and running, and a Let’s Encrypt HTTPS certificate has been automatically
generated for you. Go to https://your-domain-name.example.com and enjoy!
The worker mode of FrankenPHP is enabled by default in prod. To disable it, add the env
var FRANKENPHP_CONFIG as empty to the compose.prod.yaml file.
# Disabling HTTPS
Alternatively, if you don’t want to expose an HTTPS server but only an HTTP one, run the following command:
SERVER_NAME=http://localhost \
MERCURE_PUBLIC_URL=http://localhost/.well-known/mercure \
TRUSTED_HOSTS='^localhost|php$' \
APP_SECRET=ChangeMe \
CADDY_MERCURE_JWT_SECRET=ChangeThisMercureHubJWTSecretKey \
docker compose -f -compose.yaml -f compose.prod.yaml up --wait
# Deploying on Multiple Nodes
If you want to deploy your app on a cluster of machines, we recommend using Kubernetes. You can use Docker Swarm, which is compatible with the provided Compose files.
# Configuring a Load Balancer or a Reverse Proxy
Since Caddy 2.5, XFF values of incoming requests will be ignored to prevent spoofing. So if Caddy is
not the first server being connected to by your clients (for example when a CDN is in front of
Caddy), you may configure trusted_proxies with a list of IP ranges (CIDRs) from which incoming
requests are trusted to have sent good values for these headers. As a shortcut, private_ranges may
be configured to trust all private IP ranges.
php_fastcgi unix//var/run/php/php-fpm.sock
php_fastcgi unix//var/run/php/php-fpm.sock {
    trusted_proxies private_ranges
}
# Building Next.js client locally with SSG
When deploying API Platform with Docker Compose and you need to build a Next.js client that utilizes
Static Site Generation (SSG), a specific setup is required.
This setup ensures the Next.js client can access the API at build time to generate static pages.
# Configuration Steps
# 1. Adjust the compose.prod.yaml file
Modify the pwa service to ensure network communication between the pwa and php services during the build:
pwa:
    build:
        context: ./pwa
        target: prod
        network: host
        extra_hosts:
            - php=127.0.0.1
# 2. Build and start the php service
Begin by starting the php service container:
SERVER_NAME=http://localhost \
MERCURE_PUBLIC_URL=http://localhost/.well-known/mercure \
TRUSTED_HOSTS='^localhost|php$' \
APP_SECRET=!ChangeMe! \
CADDY_MERCURE_JWT_SECRET=ChangeThisMercureHubJWTSecretKey \
POSTGRES_PASSWORD=!ChangeMe! \
docker compose -f compose.yaml -f compose.prod.yaml up -d --build --wait php
# 3. Optional: Env file with create-client
If your are using the create-client generator inside your Next.js
client, you need to create a .env file in the pwa directory with the NEXT_PUBLIC_ENTRYPOINT
environment variable to ensure the Next.js client knows where to find the API:
NEXT_PUBLIC_ENTRYPOINT=http://php# 4. Build the pwa service
docker compose -f compose.yaml -f compose.prod.yaml build pwa
# 5. Finally, bring up the full project
SERVER_NAME=http://localhost \
MERCURE_PUBLIC_URL=http://localhost/.well-known/mercure \
TRUSTED_HOSTS='^localhost|php$' \
APP_SECRET=!ChangeMe! \
CADDY_MERCURE_JWT_SECRET=ChangeThisMercureHubJWTSecretKey \
POSTGRES_PASSWORD=!ChangeMe! \
docker compose -f compose.yaml -f compose.prod.yaml up -d --wait
These steps ensure the Next.js client can statically generate pages by accessing the API during the build process.
You can also help us improve the documentation of this page.
Using an AI coding agent? See the documentation index for LLMs at /docs/llms.txt.
